3D scanning accuracy, precision & resolution: What’s the difference?
Accuracy, precision, and resolution are three of the most important indicators of 3D scanning performance. Yet, they’re often misunderstood. In this article, we define and compare each feature in an application-specific context, providing tips for optimizing results along the way.
Introduction
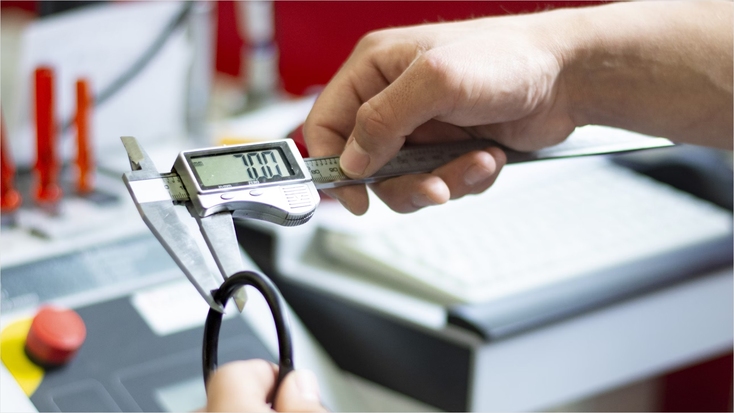
Traditional calipers being used to measure part thickness
Before we delve into the inner workings of 3D scanners, let’s take a moment to define our three key terms. In the field of measurement, accuracy refers to how close captured data is to actual dimensions. Precision describes measurement consistency, while resolution is a measure of how much information a device can capture from a given area on an object’s surface – at least it is in a broad sense. There are various forms of resolution that we’ll get into later.
For a full breakdown of each term, the Joint Committee for Guides in Metrology (JCGM) and the International Organization for Standardization (ISO) have also developed some in-depth resources – we’ll include links to relevant pages throughout the article.
Key point
Accuracy, precision, and resolution are all critical 3D scanning metrics but each has a distinct impact on results.
Your 3D scanning application will likely lead you to treat these specifications with varying degrees of importance, but each impacts results. If you work in reverse engineering or quality control, the accuracy and precision of measurement systems will be top priority. CGI modelers, on the other hand, are more likely to focus on high resolution for greater realism.
As such, understanding all three measures of 3D scanning performance is vital to getting the most out of the technology. However, given how often accuracy, resolution, and precision are misused (even within the industry), there’s clearly still a lot of confusion about how they compare. Precision and accuracy, for example, are sometimes used to describe surface detail capture, when in fact the quality of surface data comes down to resolution.
Things are further complicated by the fact accuracy, precision, and resolution may be different, but they can still affect one another. To clear everything up, let’s do a deep dive into the world of 3D scanning specifications. Buckle up, things are about to get technical!
Accuracy
3D scanning accuracy can either be measured per point or volumetrically. Most 3D scanner specifications list single-scan accuracy – how close it can get to an object’s true measurements with a single captured image. By measuring the combined volume of all the different views of an object captured during 3D scanning, it’s also possible to identify volumetric accuracy.
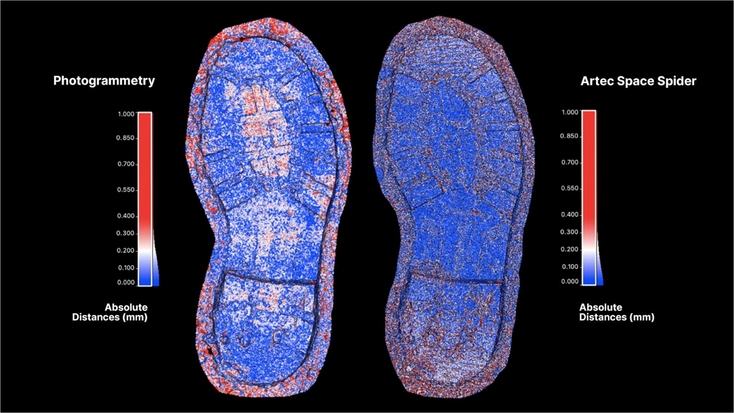
Artec 3D scanning is far more accurate than capture alternatives like photogrammetry
Accuracy can vary from direction–to-direction inside a scan volume (or even in subvolumes), so this is measured against a reference object, with the worst-case figure being listed by manufacturers. Therefore, when we talk about volumetric accuracy, we’re really referring to the ‘total measurement volume’ captured.
If, for example, we were to 3D scan a coin (and there was nothing else around it), the total measurement volume would be that of the object. This means that scanning distance doesn’t affect the parameter – it will meet the manufacturer’s stated minimal error level either way.
It’s more a matter of the size of a capture scene, with volumetric accuracy falling for larger objects. As a result, the specification is most useful as a yardstick for assessing a 3D measurement system’s ability to capture at scale.
However you measure it, the level of accuracy you can now achieve with 3D scanning is pretty incredible. Handheld structured-light 3D scanners typically capture surfaces with 0.01-1.0 mm accuracy, but it’s possible to get even closer-to-reality scans. Desktop solutions like Artec Micro II, for instance, are capable of 3D scanning with a deviation of just 0.005 mm (or 5 microns).
Of course, all the above comes with the caveat of ‘measurement uncertainty.’ Scan accuracy is often measured by comparing point clouds to fitted geometric objects. This is because scans inherently accrue a level of ‘error’ that prevents us from comparing against a ‘true value.’ But we can at least identify the error range – and the reference-measured accuracy will lie within this.
Alongside distance, capture conditions and technology are also vital criteria when it comes to optimizing accuracy. While LiDAR captures less accurate measurements than structured light, it’s better suited to scanning at range. Non-metrological photogrammetry, meanwhile, is even less reliable for accurate data capture but delivers ultra-realistic models.
When it comes to optimizing data capture, honing your technique will also improve results, as will perfecting conditions – with excess lighting and temperature likely to distort your scan.
Key point
Often confused, accuracy and precision are quite different. One reflects deviations between measured and reference values, the other indicates repeatability and reproducibility.
Precision
In the wider world, precision is often used as a synonym for accuracy. Like accuracy, precision is tricky to put a number on due to measurement uncertainty, but in the context of 3D scanning, it refers more to capture consistency.
While scan accuracy is measured by how close a measured value is to a reference one, precision is ascertained from repeat testing, with low differentiation between measurements indicating high performance.
Again, changes in measurement conditions can influence the repeatability of results. Therefore, user, environment, and 3D measurement system uniformity are vital to maximizing precision. While it depends on your device, you can often achieve submillimeter precision, sufficient for reverse engineering and quality control – even in demanding industrial environments.
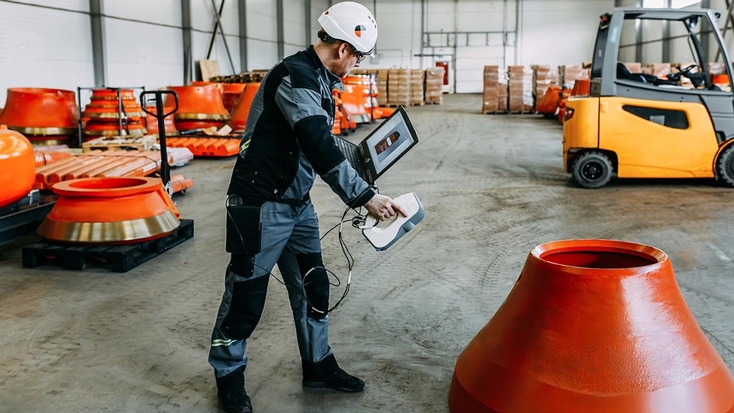
Artec Eva is used to capture precise measurements of mining and ore processing equipment. Photo by Element Mining and Construction
According to the relevant ISO standard for precision, it’s not just about repeatability, but also ‘reproducibility.’ In the former, it’s assumed that measurements are taken by a single operator with the same equipment at regular intervals, but the latter accounts for variability in each area. Together, they indicate the two extremes of precision: the minimum and maximum results.
Key point
Submillimeter precision is vital to obtaining the repeatable measurements required for reverse engineering and inspection.
It’s also worth noting how precision is required for accuracy, but it’s not the same vice versa. This is because a 3D scanner may be precise, capturing the same point each time, but due to issues around calibration, it could yield a result with ‘measurement bias’ – leading to an inaccurate reading. That’s just one example of an accuracy, precision, and resolution crossover. We’ll investigate more later!
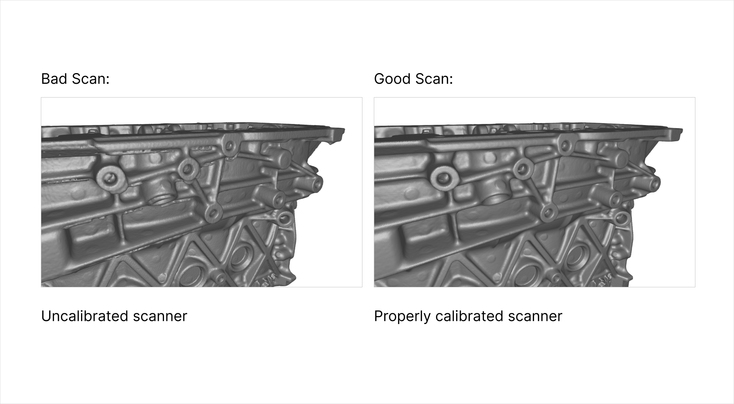
Uncalibrated vs calibrated 3D scanning: a direct comparison
Resolution
Typically measured at the tip of a device’s field of view for best results, resolution is defined as the smallest increment between two points in a captured 3D data point cloud. Resolution also determines how large each piece of a triangulated mesh will be, with smaller triangles yielding more detail-heavy models.
However, when acquiring a new 3D scanner, it’s always worth checking what the manufacturer means by resolution. There’s mesh resolution (the maximum resolution of the final model), 3D space resolution (3D point density in a given space), and single-frame resolution (how dense 3D points are in each frame prior to registration).
Depending on your application, you may also encounter structural resolution (the size of the smallest separately measurable structure), and metrological resolution (the smallest perceptible change between a known dimension and a measured quantity).
There are a few caveats to each term. Mesh resolution – which is configurable by users during mesh fusion – can also hit submillimeter levels. But as it’s dependent on trajectory, noise, and numerous other factors, it’s always expressed as an ‘up to’ figure.
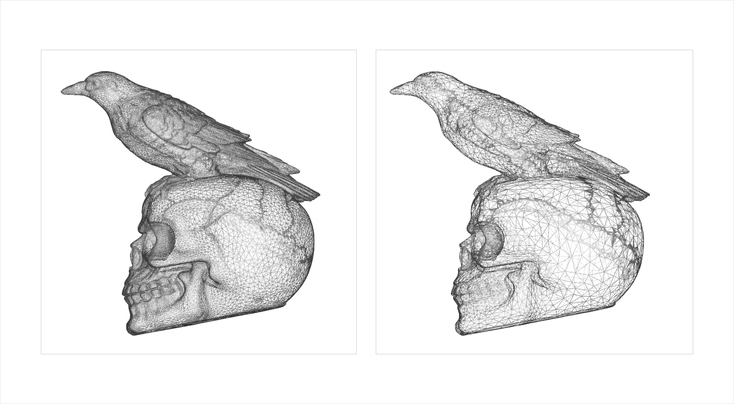
A highly triangulated mesh (left) features greater detail than one with low triangulation (right)
Similarly, 3D space resolution is measured by the number of data points captured per cm2 at a certain depth. So, the further a device is from a measured quantity, the fewer the points it can project onto its surface – resulting in low-resolution scans.
Key point
It’s possible to enhance resolution with upscaled scans, but you’ll need high-end hardware for best results.
Not all of the aforementioned specs are hardware-dependent. If you have a low-end scanner, you can always use techniques like interpolation (adding calculated points between two measured ones). This won’t boost structural resolution – so you won’t be able to resolve smaller elements than before – but it will improve mesh resolution. That said, investing in a 3D scanner with high-resolution cameras is the best way to capture peak texture detail every time.
Difference between accuracy and precision
While both important measures of observational error, scan accuracy and precision are scored against completely different criteria. The former is compared to a reference figure – the dimensions of a target object – with the result reflecting how close it can get to achieving the same value. The latter is measured against previous scans under identical conditions.
Then there’s the lack of correlation between the two. As you can see in the image below, both are necessary for capturing usable 3D data, but there’s no guarantee of that happening. Where accuracy and precision do overlap is in the way they can be improved – preventing light scattering during scanning is key to optimizing data capture on both fronts.
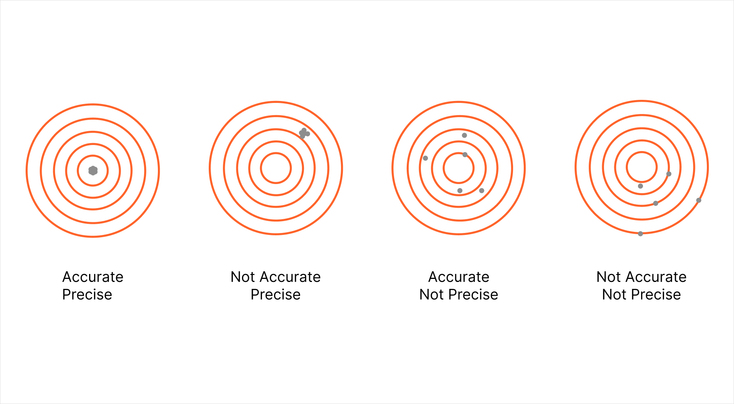
The impact of low-accuracy, precision, and resolution on 3D scanning results
Difference between accuracy and resolution
Accuracy is all about generating a 3D point cloud with dimensions that closely resemble those of a 3D-scanned object, while resolution refers to the number of these points captured and how close they are to one another.
As such, it’s not really possible to compare accuracy to resolution. However, when you consider that less detailed scans yield data with fewer triangles post-triangulation, it is possible for resolution to impact accuracy. Reduced detail is not in itself a result of poor accuracy, so the two measures aren’t inextricably linked, but it’s worth noting how accuracy is the sum of many parts.
This can also be seen in 3D scan data capture and processing software Artec Studio, which features a high-resolution HD Mode that reduces surface noise and generates more points – effectively boosting accuracy. With its ability to reconstruct surfaces on inclinations and small objects, Artec Studio helps fit CAD primitives too, enhancing accuracy further.
Difference between resolution and precision
Resolution and precision are less commonly confused, but it’s still worth emphasizing the difference between them. One relates to how many data points are picked up during 3D scanning, the other describes the consistency with which they are captured.
However, depending on your industry, resolution and precision may well be equally important to achieving results. If for example, you need to repeatedly inspect products that feature complex geometries and intricate surfaces, obtaining precise, detailed data will be essential.
Where are accuracy, precision, and resolution critical?
Everywhere you look, from healthcare and education to aerospace and defense, 3D scanning is utilized for accurate, precise, high-resolution data capture. But there are areas where some of these aspects are more important than others.
When capturing objects for reverse engineering, for example, sub-millimeter accuracy is essential to generating a mesh close enough to the original for 3D modeling. Take the Sadler Vampire airplane 3D scanned by 3DMakerWorld. Without the 0.1 mm accurate data captured by Artec Leo, it would be impossible to reverse engineer spares, as desired by its client.
Key point
Depending on your field, you may prioritize one over another, but accuracy, precision, and resolution are relevant across industries.
Where you need to capture repeat geometries with the least possible deviation, precision 3D scanning is similarly important. GoMeasure3D has demonstrated this by using Leo to capture and examine entire sections of railway tracks – the idea being that deviations can be detected earlier to prevent rail incidents with 3D scanning.
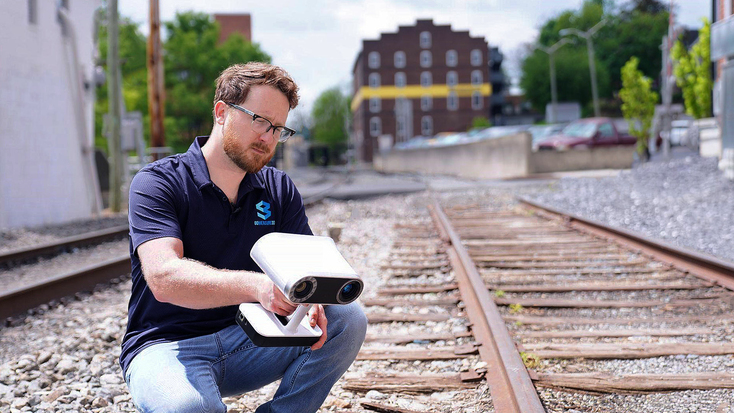
Scanning a section of rail with Artec Leo
Resolution, on the other hand, is vital to 3D modelers creating ultra-realistic digital copies. This can be seen in areas like heritage preservation, forensics, and CGI. One of the more impressive applications of 3D scanning in CGI has seen renowned special effects makeup artist Kazu Hiro use Leo and Artec Space Spider to capture actors’ faces in incredible detail.
Of course, these are just a few examples of the possibilities served up by professional-grade 3D scanning. Capturing with high accuracy, precision, and resolution unlocks many more.
How to get the best 3D scanning results
Given that your 3D scanner will automatically lose accuracy and precision over time, it’s important to calibrate regularly. Depending on the device you adopt, this could involve the occasional use of a calibration board, or target calibration every time you fire it up.
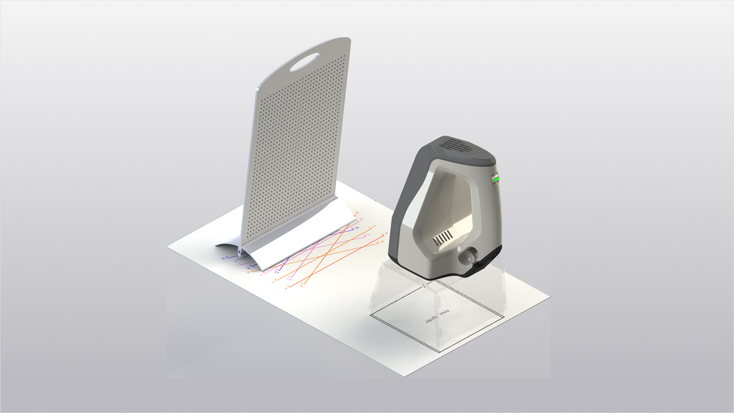
Artec Spider being calibrated so it can deliver peak precision and accuracy
Key point
While user skill, calibration, and conditions all have an impact, only professional 3D scanning will deliver peak performance.
As you can tell from the applications listed above, 3D scanning is now utilized in so many different industries it’s impossible to find a one-size-fits-all solution. It’s therefore critical to identify the needs of your specific application early on, which could see you prioritize accuracy, precision, or resolution (maybe even all three). Investing in a measurement system that doesn’t capture everything required can turn into an expensive mistake.
Other factors like scanning environment and distance also impact results, with accuracy and resolution both lower when scanning from afar. The good news is there are now many versatile 3D scanners, as well as tripod-mounted offerings like Artec Ray II, which boasts a 140m+ range and 1.9 mm accuracy, on the market. So there’s bound to be a device that meets your needs.
Finally, accuracy, precision, and resolution are all key to professional applications like 3D modeling, reverse engineering, and quality control. Now that you have an understanding of how each works, you can optimize results in each of these areas. And as software and hardware continue to advance, the technology will only continue to improve on all three fronts.
