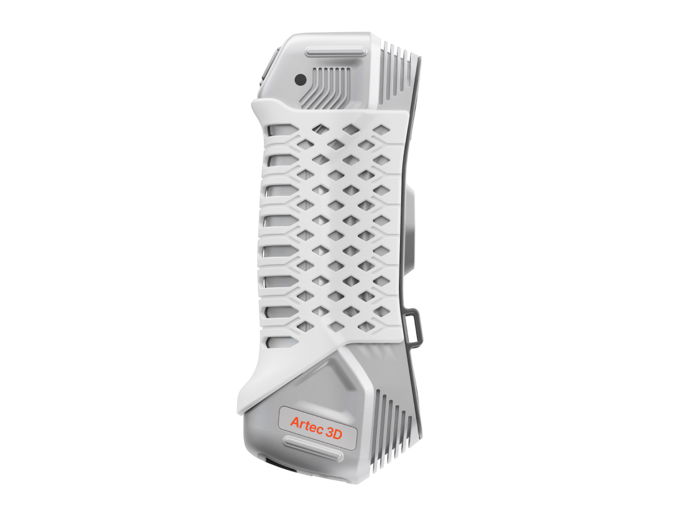
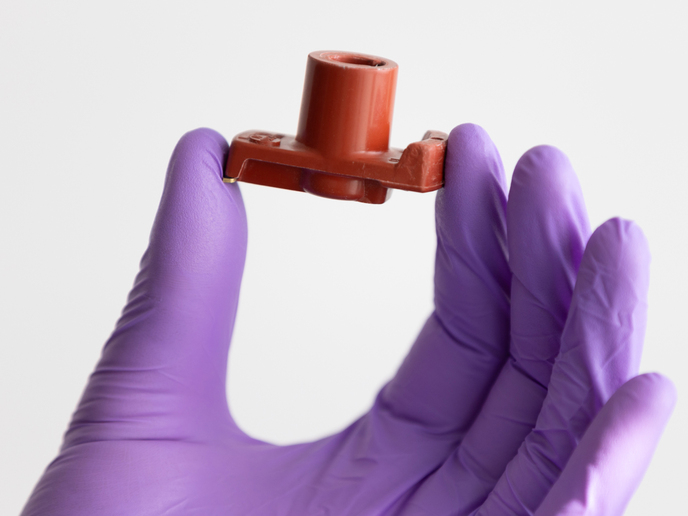
Laser scanner for metrology capture in the palm of your hand
Artec’s first target-based 3D laser scanner introduces ISO-certified, metrology-grade 3D scanning to your workflow. Artec Point rapidly captures complex surfaces – even those featuring black or shiny exteriors – with up to 0.02 mm accuracy for quality control and reverse engineering.
Alternate between grid, parallel, and single-laser modes to maximize results and use HD cameras fixed at a steep viewing angle to capture in narrow areas. Featuring IP50 dust protection and a light yet robust metal casing, the Artec Point is sufficiently versatile for use in demanding industrial environments.
When it comes to capturing intricate objects with high repeatability and pinpoint accuracy, Artec Point always delivers, making it the ideal solution, wherever you need fast, reliable data.
Stunningly accurate models – every time
With super high accuracy, solid tracking, and dedicated modes for complex geometries, the Artec Point 3D scanner captures highly repeatable metrology data you can count on.
Metrology-grade accuracy
Artec Point captures complex surfaces with incredible accuracy and repeatability, consistently delivering high-quality data for industrial metrology.
Incredibly easy to use
Most of Artec Point’s main functions can be carried out with four easy-to-access buttons that users are able to configure for optimal workflow efficiency.
Steadfast tracking
Capture objects at a rate of up to 120 FPS for tracking that stays fully locked onto objects, ensures there are no holes in your data, and makes Artec Point a breeze to use.
Switch mode for tricky surfaces
Change between three modes for best results – a high-speed grid, parallel lasers for complex geometry capture, and a single laser for obscure geometries like deep holes.
Magnify for a closer look
Zoom in to view surfaces up to 8x more closely for complete scan coverage that picks up tiny details that may not be visible upon first glance.
Wide field of view
The Artec Point 3D laser scanner features a vast scanning area that allows it to capture larger objects while keeping targets in view for seamless, high-speed 3D scanning.
Perfect for metrology 3D scanning

A metrology-certified 3D laser scanner
Artec Point’s high accuracy and repeatability are ISO & VDI/VDE-certified, so you can use it for advanced metrology, confident that you’ll get immediate, reliable results.
Achieve high repeatability
With an intuitive interface and unshakable tracking, Artec Point ensures that you get repeatable results regardless of operator skill, without having to fine-tune any settings.
Capture in confined areas
With a featherweight frame and ergonomic design, Artec Point can easily be used one-handed, and tilted to scan under, behind, or into seemingly unreachable areas.
Robust build quality
Housed in a metal, grip-friendly casing, the Artec Point 3D scanner is ideal for industrial metrology applications where durability is essential.
Technical specifications
| Scanner type | Handheld |
| 3D light source | Blue laser, class II (eye-safe) |
| 3D point accuracy, up to | 0.02 mm (0.0008 in) |
| Volumetric accuracy, up to | 0.015 mm + 0.035 mm/m (0.0006 in + 0.0014 in/ft) 0.015 mm + 0.015 mm/m with Artec Metrology Kit (0.0006 in + 0.0006 in/ft) |
| Weight | 570 grams (20.1 oz) |
| Scanning rate, up to | 2.8 million measurements/s |
| Capture rate, up to | 120 FPS |
| Scanning area | 700 × 600 mm (27.6 × 23.6 in) |
| Depth of field | 550 mm (21.7 in) |
| Size of scanning object/area | S–L |
| Certification | IP50 dust protection, ISO 17025 accredited based on VDI/VDE 2634 & JJF 1951 |
Adapt to different surfaces in a single click
Artec Point’s three modes allow you to switch between scanning large objects at pace, capturing intricate details, and digitizing deep holes, at the click of a button.
Accelerate your workflow using a 17 x 17 crossed-laser grid that accurately captures large objects at pace, and keep poly-count to a minimum for lightweight 3D models.
Deploy 7 parallel lasers to digitize complex surfaces in high resolution, detect more intricate details like engraved features, and get the data needed for advanced metrology tasks.
Scan with a single laser to maneuver into hard-to-reach areas and capture data exactly where you need it – even inside deep grooves or holes, for quality inspection and reverse engineering.
Artec Studio

Real-time visualization
Artec Studio’s intuitive color-coded 3D Radar gives users the feedback needed to adjust their scanning approach for optimal data capture in real time.
Fast-track data processing
Target-based 3D scanners and Artec Studio are the perfect match – capture and processing are so quick and easy, you can often get from scan to mesh in seconds.
A truly all-in-one software
Artec Studio features all your reverse engineering and inspection essentials – data can be sent to Control X in just one click, for more advanced use cases.
Compare scans to CAD data
Tidy meshes and create CAD bodies with auto-surfacing, then check for deviations instantly without having to leave the same tab – let alone open another software.
Inspection tools built-in
Divide scans into sections, uncover defects with Artec Studio’s 3D Compare Map, and ensure products meet standards with intuitive Tolerance Checking.
Merge scans to boost results
Combine scans from our first handheld target-based 3D laser scanner with data captured by other Artec 3D scanners to create large, even more detailed 3D models.
Applications
Quality control
Go through product batches with a fine-tooth comb to ensure they meet desired tolerances and quality standards before they’re installed or shipped to customers.
Reverse engineering
Accuracy is a cornerstone of effective reverse engineering – capture exact geometric representations for comparison, or turning into duplicates for iteration.
Retrofitting
Capture parts no longer in circulation, convert to CAD, and remanufacture for modern applications – making improvements as you see fit.
Creating aftermarket parts
Design new parts like custom automotive hoods that fit perfectly onto existing geometries with a submillimeter-accurate 3D scanner.
Maintenance, repair, and overhaul
Digitize damaged parts with high accuracy to find defects, uncover out-of-tolerance geometries, and carry out repairs that keep assemblies and workflows operating.
Inspection at any scale
Ensure that any small-to-medium-sized product will perform as desired. Whether in small batches or at an industrial scale, Artec Point is ideal for checking parts in fine detail.
Industries
With metrology-grade accuracy and a lightweight, versatile design, the Artec Point 3D scanner can be applied across industries, but it’s best suited to the following:
Automotive
Agile, lightweight, ultra-accurate 3D scanning is the perfect mix for capturing everything from vehicle hoods, door panels, and spoilers, to tricky-to-navigate interiors.
Aerospace
Meeting ultra-fine tolerances can be tricky at the best of times. Artec Point is fast, easy to pick up, and delivers outstanding accuracy for capturing tricky, shiny airfoil surfaces.
Manufacturing
No matter which technology you use – machining, injection molding, casting or something else entirely, the Artec Point 3D scanner is an excellent high-speed, non-contact QI solution.
Heavy industry
Even when it comes to capturing large, heavy-duty objects, Artec Point is up to the challenge. Accurately digitize anything from tiny bolts to iron castings with ease.
Mold-making
Non-compliant molds will only yield sub-par parts. Activate Artec Point’s hyper-fine scanning mode to closely evaluate their geometries before entering full production.
Energy
Whether it be piston heads or pipes in offshore networks, Artec Point is perfect for inspecting fitted parts in the energy sector to see if they need repairing or replacing.
FAQ
-
Does the Artec Point 3D laser scanner require targets?
Yes, Artec Point is a target 3D scanner. This means that users will need to attach targets to any object they wish to capture for best results. But after calibration the process is the same as other Artec 3D scanners – simply capture and process scan data on Artec Studio.
-
How do Artec Point’s scanning modes work?
You can switch between Artec Point’s three modes at the click of a button. Ultra-fast scanning quickly captures large objects in less detail, Hyper-fine scanning offers higher resolution for tricky-to-scan surfaces, while Hole scanning is ideal for digitizing narrow geometries.
-
Can I pair Artec Point with other Artec 3D scanners?
Absolutely! Data captured with Artec 3D scanners (including Artec Point) can be combined into incredibly detailed models formed using the highest-resolution data from each device.
Which 3D scanner?
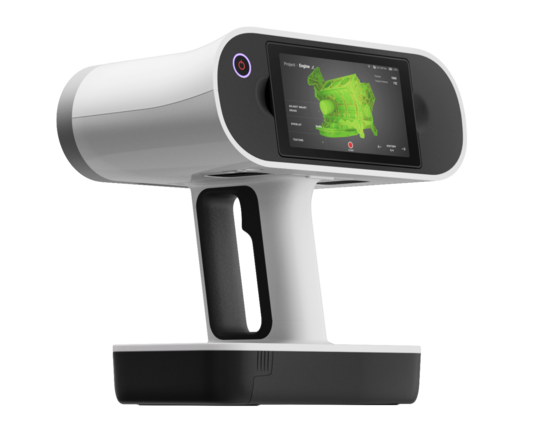
User-friendly portable laser 3D scanner with an inbuilt touchscreen and intuitive UI for easy 3D scanning.
| Scanner type | Handheld |
|
Object size
Typical object sizes:
XS: <5 cm S: 5–20 cm M: 20–50 cm L: 50–200 cm XL: >200 cm |
M, L |
| Accuracy | up to 0.1 mm |
| Resolution | up to 0.2 mm |
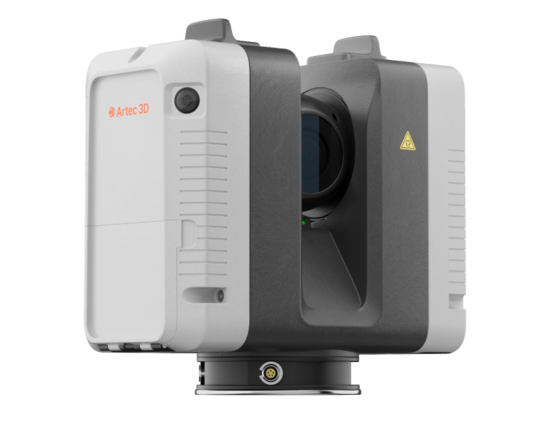
Powerful long-range laser 3D scanner for precise capture of massive objects and scenes with remarkable speed and high accuracy.
| Scanner type | Long-range |
|
Object size
Typical object sizes:
XS: <5 cm S: 5–20 cm M: 20–50 cm L: 50–200 cm XL: >200 cm |
L, XL |
| 3D point accuracy, up to | 1.9 mm @ 10 m |
| Resolution | 3 / 6 / 12 mm @ 10 m |
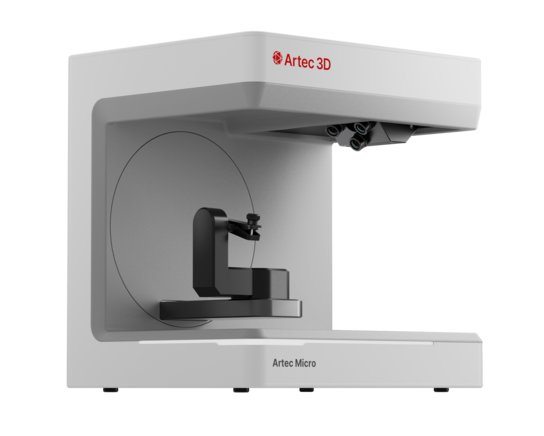
A metrology-grade 5-micron accuracy desktop 3D scanner and automated, one-click solution.
| Scanner type | Desktop |
|
Object size
Typical object sizes:
XS: <5 cm S: 5–20 cm M: 20–50 cm L: 50–200 cm XL: >200 cm |
S, XS |
| Accuracy | 0.005 mm |
| Resolution | 40 microns |

Built for scanning in advanced resolution and perfect color, this target-free 3D industrial scanner captures complex geometry and sharp edges.
| Scanner type | Handheld |
|
Object size
Typical object sizes:
XS: <5 cm S: 5–20 cm M: 20–50 cm L: 50–200 cm XL: >200 cm |
S, M |
| 3D point accuracy, up to | 0.05 mm |
| 3D resolution, up to | 0.05 mm |
New
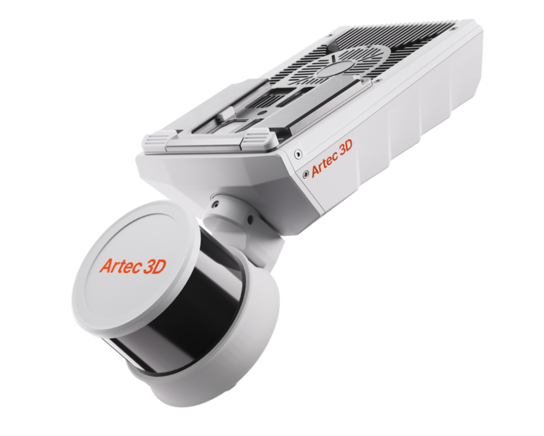
Ultra-versatile SLAM-based LiDAR scanner for capturing large areas, including construction sites, road networks, and hazardous, difficult-to-access environments.
| Scanner type | Multi-modal |
|
Object size
Typical object sizes:
XS: <5 cm S: 5–20 cm M: 20–50 cm L: 50–200 cm XL: >200 cm |
XL, XXL |
| Accuracy, up to | ±10 mm |

Our bestselling structured-light 3D scanner. Fast, versatile, and accurate.
| Scanner type | Handheld |
|
Object size
Typical object sizes:
XS: <5 cm S: 5–20 cm M: 20–50 cm L: 50–200 cm XL: >200 cm |
M, L |
| Accuracy | up to 0.1 mm |
| Resolution | up to 0.2 mm |
Tech specs
| Resolution & accuracy | |
|---|---|
| Resolution, up to | 0.02 mm |
| Accuracy, up to | 0.02 mm |
| 3D accuracy over distance, up to | 0.015 mm + 0.035 mm/m (0.0006 in + 0.0014 in/ft) 0.015 mm + 0.015 mm/m with Artec Metrology Kit (0.0006 in + 0.0006 in/ft) |
| Scanning range | |
|---|---|
| Size of scanning object/area | S–L |
| Working distance | > 300 mm |
| Linear field of view H×W @ furthest range | Up to 700 × 600 mm |
| Depth of field | 550 mm |
| Speed | |
|---|---|
| 3D reconstruction rate for real-time fusion, up to | 120 fps |
| Data acquisition speed, up to | 2.8 mln measurements/s |
| Scanning modes | |
|---|---|
| Ultra-fast scanning | 17 crossed blue lasers |
| Hyper-fine scanning | 7 parallel blue laser lines |
| Deep hole scanning | 1 single blue laser line |
| Hardware | |
|---|---|
| Scanner type | Handheld |
| Power source | AC/DC power adapter, 24V |
| Interface | USB 3.0 |
| 3D structured-light source | Class II blue laser (eye-safe) |
| Dimensions H×D×W | 203 × 80 × 44 mm |
| Weight | 0.57 kg/1.3 lbs |
| Warranty | 1 year |
| Certification | ISO 17025 accredited based on VDI/VDE 2634 & JJF 1951 |
| Dust protection | IP50 |
| Compatibility | |
|---|---|
| Supported OS | Windows 10, 11 |
| Recommended computer parameters | Intel processor with 8 cores, 16 threads, 2.6 GHz and above, 64+ GB RAM, GPU with 8 GB VRAM |
| Minimum computer requirements | Intel processor with 8 cores, 16 threads, 2.6 GHz and above, 32+ GB RAM, GPU with 4 GB VRAM |
| Output formats | |
|---|---|
| 3D mesh | OBJ, PLY, WRL, STL, AOP, ASC, Disney PTX (PTEX), E57, XYZRGB |
| CAD | STEP, IGES, X_T |
| Measurements | CSV, DXF, XML |

