Artec Ray II
Lightning-fast long-range laser 3D scanner for professional captures with high accuracy
1-year warranty
Speed
Capture a full dome at highest resolution in 1.7 mins.
Accuracy
Expect data with an uncompromised 3D point accuracy of 1.9 mm from 10 meters.
Resolution
No details missed at a resolution of 3 mm at 10 meters.
Introducing the Artec Ray II
With the high-accuracy, long-range, wireless Ray II laser 3D scanner you can precisely and rapidly capture large to massive objects, scenes or areas, and from up to 130 m away. Expect 3D point accuracy that meets high professional standards and best-in-angular-class accuracy.
Ideal for precise capture of huge objects such as wind turbines, ship propellers or airplanes, bridges or factory floors, forensic scenes or archeology sites, this professional LiDAR solution produces 3D scans of the highest quality, whether your application is reverse engineering, inspection, creating true-to-life digital twins, documenting crime scenes, or making change-over-time assessments of civil infrastructure.
The wireless Ray II’s lightweight portability make it a cinch to take anywhere you need: vehicles can be captured in minutes, aircraft and full-sized buildings in just a few hours.
Lightning fast and long range
Discover how the high-accuracy Ray II can capture huge objects and spaces, with no details missed.

Metrology-grade precision
| 3D point accuracy @10m | 1.9 mm |
| 3D point accuracy @20m | 2.9 mm |
| 3D point accuracy @40m | 5.3 mm |
| Angular accuracy | 0.87 mm @10m (or 18 arcseconds) |
| Range accuracy | 1.0 mm + 10 ppm |
| Range noise | 0.4 mm @ 10m - 0.5mm @ 20m |
Check & Adjust
If your device isn’t perfectly calibrated, your scanner will either automatically calibrate itself by scanning the surroundings, or let you know if further action is required.
Accuracy certificates
Scan with full confidence knowing that your scanner has been verified to fall within specifications.
Declaration of conformity
Your scanner has been rigorously tested and is guaranteed to conform to the required list of 11 European safety standards.
Brilliant texture
Detect even the smallest surface irregularities with Ray II’s 36 MP 3-camera system, with exceptional HDR texture.

Lifelike replicas
In heritage preservation, Ray II enables the recreation of every detail in true-to-life color.
For critical evidence
In forensic applications, enhanced color accuracy facilitates identifying crucial evidence such as bloodstains.
Fast & easy
| Resolution | 3 mm | 6 mm | 12 mm |
|---|---|---|---|
| Without texture | 1.7 min | 0.85 min | 0.4 min |
| With texture | 2.7 min | 1.9 min | 1.4 min |
Remote scanning
When scanning something large, in an inaccessible location, or at a height you can’t safely be on, control your scanner easily and from a distance with the Artec Remote App.
Real-time registration on board
Track the scanner’s movement in real time with feature tracking and advanced algorithms for intuitive 3D-space navigation including Ray II’s Visual Inertial System (VIS), Altimeter, compass, and Global Navigation Satellite System.
Automatic removal of moving objects
Ray II’s smart auto-removal of moving objects that may enter or exit the scene keeps all captured data focused on exactly what you need.
Continuous supply battery system
Powered by two hot-swappable batteries and another two on standby, the 3D laser scanner Ray II comes ready to scan for a full 8 hours. Need more time? Charge while you scan, and swap without any downtime.
Water and dust protection: IP54 (IEC 60529)
Your scanner is protected and your work kept safe with the Ray II’s water and dust protection, designed to keep particles or humidity from getting into your device.
Perfect match for Leo
Exceptionally well-suited for use with the wireless powerhouse Artec Leo, the duo can quickly capture large or even massive objects with high accuracy and full coverage.


Power couple
An unbeatable combination of two smart, wireless scanners: Artec Ray II’s range and speed for full scenes and large objects, the handheld Artec Leo for specific areas and angles.
All Artec 3D scanners
The long-range Ray II also integrates with all other Artec 3D scanners in seconds.
Scan-to-CAD export
Upload to Artec Studio to precisely position and fit your scans with CAD primitives, then export to SOLIDWORKS or other CAD software – or for inspection, directly to Geomagic Control X for in-depth reports.

Applications
-
Aerospace
Harnessing Ray II’s power to capture up to 2 million points per second, now engineers can streamline aircraft inspection, design, development, and testing for faster, safer, and more fuel-efficient flights.

Fast, extensive scan coverage
In less than 2 minutes per scan, the Ray II captures a vast spectrum of complex shapes and intricate details, such as fuselages, wings, landing gear assemblies, propellers, turbine blades, and more.
Metrology-grade precision
Highly precise scans open up a horizon of possibilities for FEA analysis, nose-to-tail and wing-to-wing inspections, as well as reverse engineering aircraft, in mere hours.
Optimized return on investment
Maximize your ROI week after week, with fast, sharp scans that capture all the ins and outs of large to massive objects and scenes.
-
Automotive
Taking just minutes to capture mechanical and irregular shapes and surfaces while detecting hard-to-find imperfections, the Ray II gives automotive specialists high-resolution point clouds for inspections, crash testing, design optimization, and more.

Enhanced safety and design possibilities
Improve safety standards and future designs by utilizing submillimeter point cloud data for crush deformation analysis and accident reconstruction.
Heighten your productivity with every project
Capturing up to 2 million points every second means scanning 3x to 5x the number of vehicles in the same time as before, with no sacrifice in accuracy or precision.
Accelerated reverse engineering
Reverse engineer legacy and modern vehicles faster than ever, for use in CFD testing, rapid prototyping, and beyond.
-
Digital twins
Ideal for digital twin creation pipelines, the Ray II scanner offers industry-class accuracy, speed, and ease of use for capturing surface data throughout the entire object lifecycle.

High-precision digital twin modeling
The Ray II scanner ensures the creation of high-precision, unerring scans for digital twins that closely represent their physical counterparts for critical analyses and decision-making processes.
Rapid data acquisition
With an impressive data capture rate of up to 2 million points/second, the Ray II scanner significantly reduces the time needed to create precise digital twins.
Streamlined integration with digital twin workflows
Simplify the process of incorporating any digital twin into various stages of its respective real-world object’s lifecycle, from design and planning to maintenance and beyond.
-
Forensics
Investigators can now swiftly document entire scenes and evidence as the portable, wireless Ray II introduces a new era of forensic investigation.

Fully document every scene, faster
With the right 3D scanner, you can optimize officer resources by assuredly capturing forensics scenes and all the evidence within, in just minutes.
Accurate scene reconstructions & interpretations
With the Ray II’s proven accuracy and HDR textures, create solid reconstructions and forensic interpretations of crime, death, and accident scenes.
Full documentation of all evidence
By combining the Ray II with any Artec handheld 3D scanner, investigators can document everything at a scene from pinpoint-sized bloodstains to full buildings or city blocks.
-
Quality inspection
Manufacturers and their clients can confidently detect defects and irregularities, accelerating production processes while ensuring the highest product quality control levels.

Rapid product inspections for maximum quality
Whether for pre-production, in-production, or final random inspection, now it takes less than 2 minutes to 3D scan an object and assess quality levels.
Advanced inspection reporting & easy data export
Perform submillimeter-accurate 3D inspections in Artec Studio software, or export scan data to Control X for more comprehensive inspection reports.
Boost your production standards and workflows
Achieve breakthroughs in amplified production workflows and high standards by routinely utilizing the Ray II’s lightning-fast, high-accuracy scans for inspections.
-
Reverse engineering
The Ray II, paired with Artec Studio’s scan-to-CAD functionality, stands out among all 3D laser scanners to deliver detail-rich, high-quality scans that expedite reverse engineering workflows with unrivaled, metrology-grade precision.

Exquisite results, from concept to fabrication
Streamline any reverse engineering process with scans that capture all those surface details, from mechanical to organic and beyond.
Straightforward CAD integration and development
Minutes after scanning, fit your 3D scans with CAD primitives and begin reverse engineering cars, construction equipment, planes, and more.
Accelerate your design iterations
The Ray II’s turbocharged, high-accuracy scans expedite even the most challenging design iterations and prototyping workflows.
-
Industrial design & manufacturing
Unveiling a wealth of 3D detail, the portable Ray II empowers designers and engineers to refine CAD projects, streamlining prototyping and design processes for large objects and machinery.

Expedite your design & production workflows
Modify and enhance CAD projects of all complexity levels, while facilitating iterative design workflows with fast, scan-after-scan precision.
Intricate 360° in-depth detail capture
Industrial designers and engineers can capture every single surface and all the intricate details of equipment and objects, from human-sized to massive.
Effortless reverse engineering, from scan to CAD
From Ray II to Artec Studio just minutes later, reverse engineer legacy and modern industrial objects for rapid prototyping and beyond.
-
Heritage preservation
Cultural & heritage preservation specialists can digitally safeguard priceless sites and objects with the Ray II, while enabling regular inspections and the power to transform scans into breathtaking 3D models for virtual exhibitions.

Non-invasive preservation of objects and sites
With 100% safe, non-contact scanning, cultural treasures and sites can be digitally preserved via exceptionally accurate, true-to-life 3D models.
Comprehensive building and object assessments in minutes
Assessing and documenting the structural health of heritage sites and priceless objects is effortless and takes just minutes per scan.
Immersive 3D sites and exhibitions
Easily transform Ray II’s HDR-boosted scans into immersive 3D models of single objects, sites, or entire collections, for virtual online or in-museum exhibitions.
-
Science & education
Researchers and educators benefit from the Ray II’s speed and ease of use, gaining insight and knowledge across various disciplines through razor-sharp 3D scans with vibrant HDR textures.

A wealth of precision-driven insights
Easy to learn and use, the Ray II provides scientists and teachers with precise, geometry-rich scans for more accurate analyses and deeper study insights.
Interactive 3D learning experiences with models and environments
Upgrade student educational experiences by leveraging ultra-realistic 3D models for interactive AR/VR learning environments.
Global research collaboration possibilities
Via digital repositories and modeling platforms, detailed 3D scans foster collaboration and drive innovation by connecting researchers around the world.
-
Civil infrastructure
The Ray II takes infrastructure inspection and design up to the next level, capturing structures with world-class precision and speed, improving driving safety and resilience in construction and maintenance of roads, bridges, wind turbines, tunnels, dams, and more.

Efficient inspection and monitoring
Rapidly examine and oversee the condition of various structures, facilitating prompt interventions and preventative maintenance that effectively reduce risks and expenses.
Change-over-time assessments
Utilize the high accuracy of the Ray II to conduct change-over-time assessments, revealing potential issues and improvement areas that enhance the safety and dependability of infrastructure.
Streamlined construction and maintenance
Ray II’s speed and precision support engineers and construction teams in making informed decisions, ultimately accelerating construction and repair processes while reducing down-time and disruptions to the existing infrastructure.
-
Archaeology
Boasting innovative technology, the Ray II equips archaeologists with the power to easily generate research-ready 3D excavation documentation, preserve artifacts and fossils digitally, and conduct detailed site analyses.

Comprehensive excavation documentation
Archaeologists can rapidly document excavation sites in their entirety, ensuring that all objects and stratigraphic elements present are captured.
Virtual artifact and fossil preservation
The Ray II's high-resolution scanning functionality allows for accurate, VR/AR-ready digital preservation of delicate fossils, artifacts, and relics.
In-depth site analysis
By bringing Ray II’s detailed 3D scans into their research, archaeologists can gain deeper insights into ancient cultures and civilizations, enhancing our understanding of the past.
Which 3D scanner?
Find the scanner that suits your needs best.

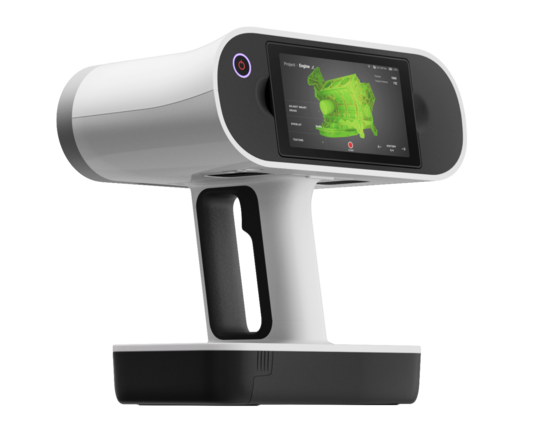
User-friendly portable laser 3D scanner with an inbuilt touchscreen and intuitive UI for easy 3D scanning.
| Scanner type | Handheld |
|
Object size
Typical object sizes:
XS: <5 cm S: 5–20 cm M: 20–50 cm L: 50–200 cm XL: >200 cm |
M, L |
| Accuracy | up to 0.1 mm |
| Resolution | up to 0.2 mm |

Built for scanning in advanced resolution and perfect color, this target-free 3D industrial scanner captures complex geometry and sharp edges.
| Scanner type | Handheld |
|
Object size
Typical object sizes:
XS: <5 cm S: 5–20 cm M: 20–50 cm L: 50–200 cm XL: >200 cm |
S, M |
| 3D point accuracy, up to | 0.05 mm |
| 3D resolution, up to | 0.05 mm |

Built for industrial metrology, this lightweight, robust laser handheld scanner captures tricky surfaces with metrological accuracy and repeatability.
| Scanner type | Handheld |
|
Object size
Typical object sizes:
XS: <5 cm S: 5–20 cm M: 20–50 cm L: 50–200 cm XL: >200 cm |
S, M, L |
| 3D point accuracy, up to | 0.02 mm |
| 3D resolution, up to | 0.02 mm |

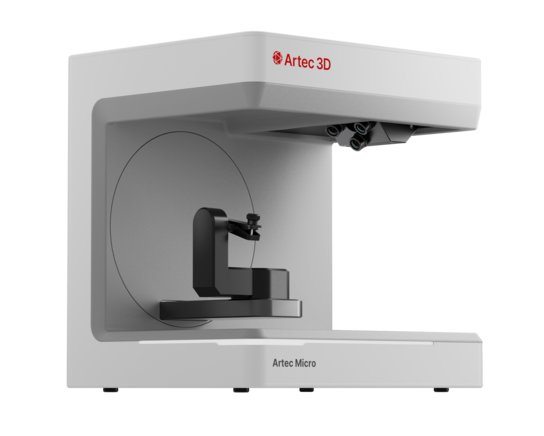
A metrology-grade 5-micron accuracy desktop 3D scanner and automated, one-click solution.
| Scanner type | Desktop |
|
Object size
Typical object sizes:
XS: <5 cm S: 5–20 cm M: 20–50 cm L: 50–200 cm XL: >200 cm |
S, XS |
| Accuracy | 0.005 mm |
| Resolution | 40 microns |

Photogrammetry kit with 2-micron accuracy, metrology-grade precision, and high volumetric accuracy for inspection, reverse engineering, and other industrial measurement applications.
| Scanner type | Photogrammetry |
|
Object size
Typical object sizes:
XS: <5 cm S: 5–20 cm M: 20–50 cm L: 50–200 cm XL: >200 cm |
M, L, XL |
| Accuracy | up to 0.002 mm |
| Resolution | — |

Our bestselling structured-light 3D scanner. Fast, versatile, and accurate.
| Scanner type | Handheld |
|
Object size
Typical object sizes:
XS: <5 cm S: 5–20 cm M: 20–50 cm L: 50–200 cm XL: >200 cm |
M, L |
| Accuracy | up to 0.1 mm |
| Resolution | up to 0.2 mm |
Tech specs
Accuracy & resolution
3D point accuracy:
1.9 mm @ 10 m
2.9 mm @ 20 m
5.3 mm @ 40 m
Angular accuracy:
18 arcseconds (0.87 mm @ 10 m)
Range accuracy:
1.0 mm + 10 ppm
Resolution:
3 user selectable settings: 3 / 6 / 12 mm @ 10 m
Range noise: At 89% albedo
For single-shot measurements
0.4 mm @ 10 m
0.5 mm @ 20 m
Field of view & range
Field of view:
360° (horizontal) / 300° (vertical)
Range:
0.5 - 130 m
Speed
3D capture rate:
Up to 2,000,000 pts/sec
Scanning time without texture @ 10 m:
1.7 min @ 3 mm resolution
0.85 min @ 6 mm resolution
0.4 min @ 12 mm resolution
Scanning time with texture @ 10 m:
2.7 min @ 3 mm resolution
1.9 min @ 6 mm resolution
1.4 min @ 12 mm resolution
Color capture
Camera:
36 MP 3-camera system captures 432 MPx raw data for calibrated 360° × 300° spherical image
HDR:
Automatic, 5 brackets
Operation
On scanner:
Touchscreen control with finger touch, full-color WVGA graphic display 480 × 800 pixels
Mobile devices:
Artec Remote app for iOS and Android tablets and smartphones including:
- Remote control of scan functions
- Settings selection
- Launch scanning
Algorithms
Real time registration:
Automatic point cloud alignment based on real time tracking of scanner movement between setups based on Visual Inertial System (VIS) by video-enhanced inertial measurement unit
Automatic removal of moving objects:
Delete captured data of moving objects using Double Scan
Check & Adjust:
Field procedure for targetless checking of angular parameters
Interfaces
Wireless:
Integrated wireless LAN (802.11 b/g/n)
Data storage:
AS256, 256 GB exchangeable USB 3.0 flash drive
Hardware specifications
Scanning technology:
Time of flight enhanced by Waveform Digitizing (WFD) technology
Laser class:
1 (in accordance with IEC 60825-1:2014), 1550 nm (invisible)
Dimensions:
120 mm × 240 mm × 230 mm / 4.7" × 9.4" × 9.1"
Weight:
5.35 kg / 11.7 lbs, nominal (without batteries)
Mounting mechanism:
Quick mounting on 5/8" stub on lightweight carbon tripod or tripod adapter
Power
Internal battery:
2 × AEB364 internal, rechargeable Li-Ion batteries
Duration: Typically up to 4 hours
Weight: 340 gr. per battery
External:
GEV282 AC adapter
Environmental
Operating temperature:
-5° to +40°C
Storage temperature:
-40° to +70°C
Operating low temperatures: Extended low temperature operation is possible to -10°C if internal temperature is at or above -5°C when powered on. For extended low temperature measurement, it is recommended that QA procedures are followed.
-10° to +40°C
Dust/Humidity: For upright and upside down setups with a +/- 15° inclination
Solid particle/liquid ingress protection IP54 (IEC 60529)


