How does structured-light 3D scanning work?
To truly understand how some of the world's best 3D scanners capture objects of all sizes and complexities, we first need to take a closer look at how structured light works. In this easy-to-read article, you'll also learn about the advantages of structured light over other technologies, including CMM machines and CGI photogrammetry. Then we'll cover a few potentially challenging surfaces for structured-light 3D scanners.
Introduction
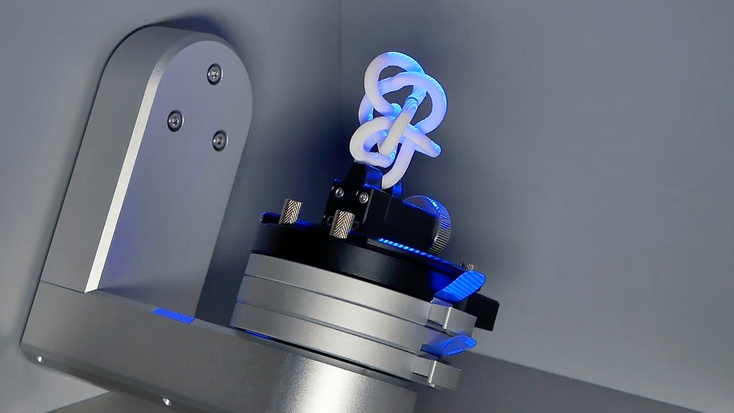
Before we dive into how structured-light 3D scanners are able to capture objects with such incredible speed and accuracy, we first need to understand what structured light really is.
In practical terms, structured light is a precisely-calibrated pattern of white or blue light that a 3D scanner beams down onto whatever object you’re scanning. Usually this pattern is a series of parallel lines, stripes, or a grid.
When structured light strikes the surface of the object, the pattern of light is distorted as it falls across any curves, depressions, or raised areas.
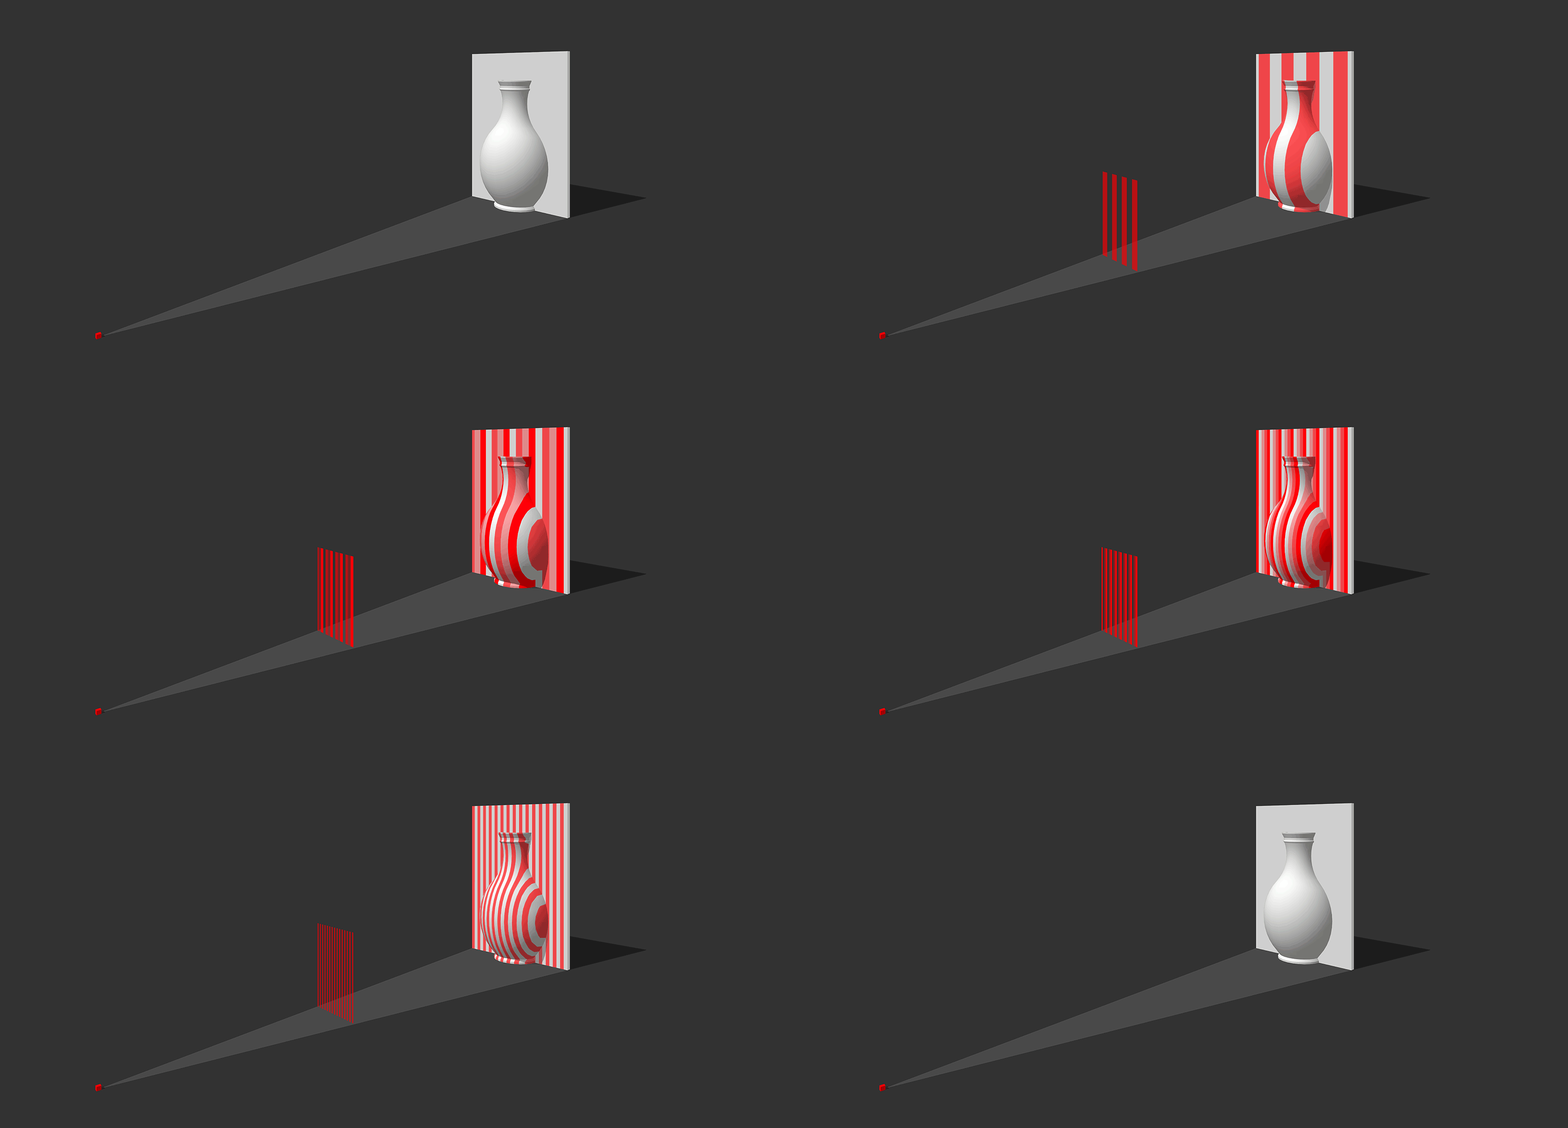
A scanner's projector (left) emits white light, which, after passing through a grid in the middle, is structured into lines, or stripes. The thicker the bars of the grid and the less space between them, the narrower the lines of light at the "exit." These otherwise straight lines are distorted as they hit the curved surface of the vase.
As that’s happening, the scanner’s camera is capturing frame after frame of these distorted light patterns as they’re reflected back, while the scanning software is analyzing the patterns and using them to accurately reconstruct in digital 3D all the surfaces of the object being scanned.
Depending upon the size of the object you’re scanning and how long you’ve scanned it, in one scanning session alone, your 3D scanner may capture dozens, hundreds, or even thousands of frames.
Key point
Structured light is a precisely-calibrated pattern of white or blue light that a 3D scanner beams down onto whatever object you’re scanning.
Transforming reflected light into high-resolution 3D models
The scanning software’s pattern-recognition and reconstruction algorithms understand that when a strip of light is thicker or thinner in places, then that means those points on the surface are respectively closer or farther away from the camera, while other shapes and structures are determined by varying types of deformations in the structured light patterns.
Some 3D scanners also include an additional camera that captures an object’s “texture.” In the world of 3D scanning and modeling, texture refers to an object’s colors and other visible surface characteristics.
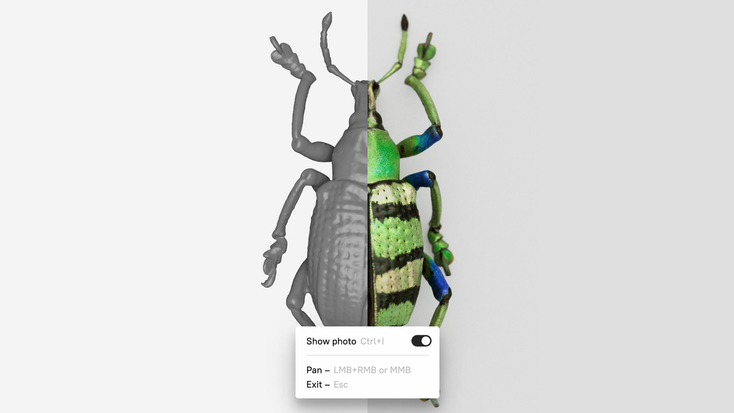
After these frames have been captured, they are transformed into a 3D model by processing them in the scanning software. This is achieved by first making use of various tools to remove any unwanted data, before aligning the frames together into one seamless 3D model.
Key point
In the world of 3D scanning and modeling, texture refers to an object’s colors and other visible surface characteristics.
If texture frames were captured during the scanning, they will subsequently be “mapped” onto the 3D model, paving the path to a final 3D model that can look almost identical to, and dimensionally reflect, its real-world original.
After this, your 3D model will be ready to export and use in a variety of applications, e.g. for healthcare, engineering, archaeology, CGI, etc.
Scanning stationary objects or using a turntable
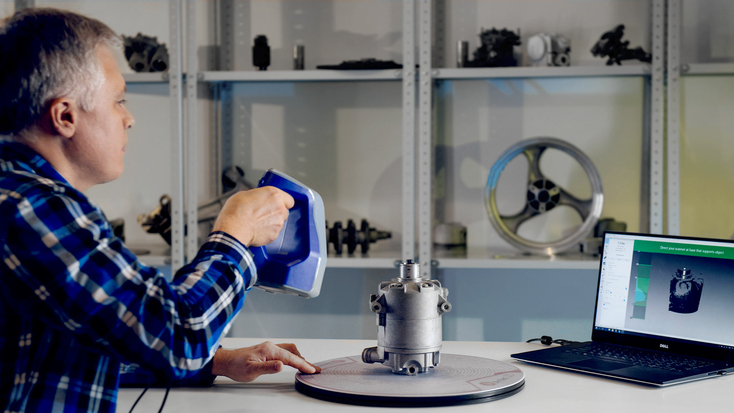
In the case of a handheld 3D scanner, in order to capture every side of an object, the scanner is picked up and moved around the object, while the scanner’s structured light beams down onto the object’s surfaces from different angles and locations, gathering immense volumes of precise surface details (some scanners capture millions of surface data points every second!).
You can also use a turntable to rotate smaller objects and scan them from all sides, while keeping your handheld scanner relatively still, except perhaps for steady up and down movements that allow you to capture the topmost and lower parts of your object.
Click-and-scan for automated 3D scanning workflows
With a stationary structured light scanner, for example, the desktop Artec Micro, you simply mount the object to be scanned onto a small scanning platform and the scanner is ready to take care of the rest.
With just one click, the scanning arm comes to life, smoothly positioning the scanning platform at various angles to allow the scanner to capture all visible sides of the object. The only intervention needed comes when you turn the object over and capture any previously-hidden surfaces.
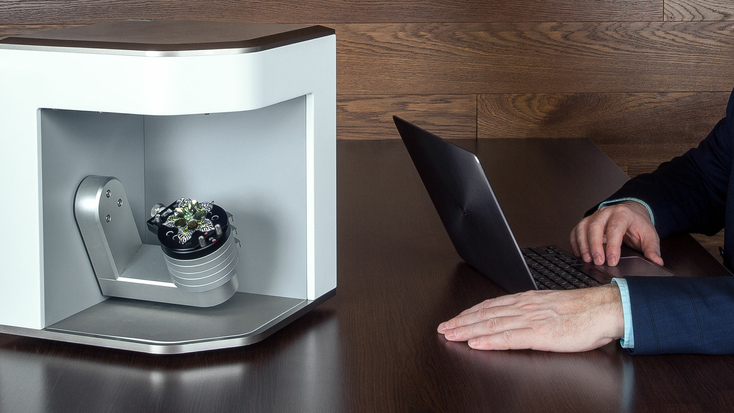
There are also stationary structured light 3D scanners that either have to be repositioned manually or are mounted on a robotic arm, which is pre-programmed to capture objects at precisely calculated positions and angles.
From hairsprings to whale jawbones: about object size
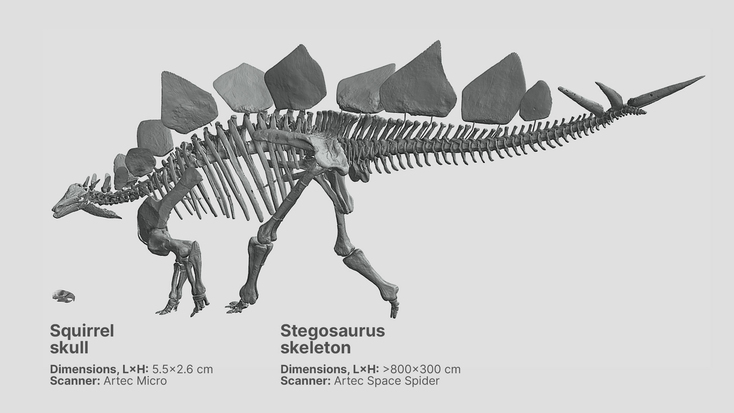
An indisputable forte of structured light 3D scanners is their ability to non-destructively capture objects from tiny to jumbo, with some solutions achieving levels of accuracy as high as 10 microns ― less than half the size of a white blood cell!
Key point
If you’re consistently working with a specific type or size of object, choose a scanner designed for the task!
Although individual scanners can be used for creating incredibly-precise digital twins of wide ranges of objects, if you’ll mostly be working with a specific size of object, you may want to consider a specific scanner that will do the job best.
How to capture pocket-sized objects of all kinds
For example, let’s say you regularly need to scan miniscule watch parts, including springs, gears, wheels, and jewels. Maybe you even have boxes of such objects waiting to be captured. Then you’ll seriously want to think about a desktop structured light scanner, such as the blue-structured-light Artec Micro, which makes it easy to just click-and-scan part after part.
The same holds true for very small aerospace parts, such as legacy CNC-milled valves, threaded bolts, switches, cylinders, and more. With high tolerances and demanding specs, nothing should be left to chance, and a desktop structured light scanner makes it possible to rigorously capture these components in only minutes.
On the other hand, if your object of choice is on a larger scale, for example, a person, you most likely won’t need a level of accuracy that’s 1/7th the width of a human hair.
Speed and portability
If your workflow includes digitally capturing humans, or animals of any kind, you will want a solution that scans quickly, otherwise when your object moves, it can easily result in a misaligned scan, which can be tedious to fix post-scanning.
In this case, be sure to check the FPS (frames per second) capture rate of the scanner you’re interested in. The higher, the better, unless you’ll be working with objects that you’re sure won’t be moving.
Key point
A higher FPS can compensate for any possible movement in the object you’re scanning.
One example of a 3D scanner designed for high speed, the utmost in portability, and uncompromising accuracy is the professional handheld Artec Leo, which boasts a frame rate of up to 80 FPS, and a data acquisition speed as high as 35 million points/second.
Being 100% wireless with a built-in touchscreen gives this 3D scanner the ability to scan practically anywhere, whether that’s maneuvering around a professional cyclist in a wind tunnel, or dangling from a rope, high above the ground while capturing the stonework of an ancient cathedral.
Capturing large objects with handheld 3D scanners
With regards to those bigger objects out there, even room-sized, quality handheld structured-light 3D scanners can do the job without breaking a sweat. That could mean using a 100% wireless, handheld 3D scanner to capture the interior cockpit and fuselage of an Airbus A380 for a hyper-realistic flight simulator, or using the same solution to scan the multi-storied façade of an entire apartment building.
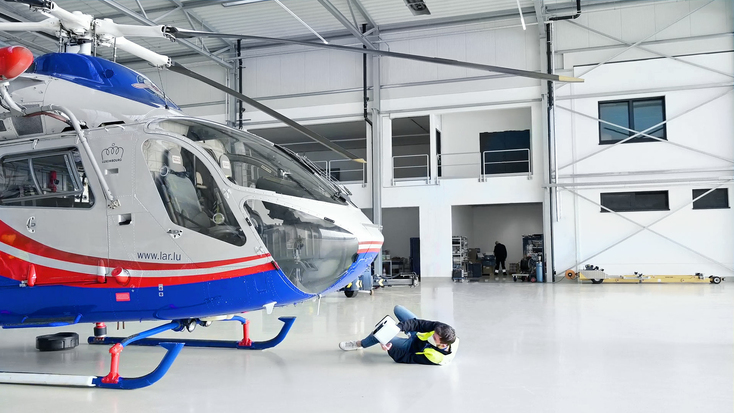
That said, when it comes to evaluating any structured-light 3D scanning solution, it’s wise to get a demo where you can see the scanner used firsthand to capture the very same kinds of objects you’ll be working with. Even better, try it out yourself! Pay close attention to how easy (or difficult) it is to set up and scan the object, as well as to process the resulting scans.
Advantages of structured light over other technologies
There’s a reason that structured-light 3D scanners have been the technology of choice for thousands of users globally for years now. Actually, there are many reasons. Here we’ll cover the most widely acknowledged strong points, along with some spheres where such benefits have had their greatest impact.
Non-contact: for numerous kinds of objects out there, the degree of handling required for contact measurement (CMM) or photogrammetry with targets simply isn’t an option. For example, if you’re working with one-of-a-kind archeological specimens or museum pieces, or high-value items from private collections.
Structured light makes it possible to capture such objects in their entirety, down to submillimeter levels of accuracy, most of the time with very little or even no contact needed. We only need to look to forensics and archaeology, where most objects are scanned in place, exactly as found, as this preserves the integrity of the object as well as the surrounding scene.
Because of this, risk of damage from contact, even ever so slight, is reduced to a bare minimum.
High-speed: when you’ve got an urgent project to complete, the last thing you want is for your tools to slow you down. Speed is one of the most compelling facets of structured-light 3D scanners. What may take a full day with traditional photogrammetry, a CMM machine, or manual measurement tools can often be finished in just an hour or two with a structured-light 3D scanner.
It's obvious what the impacts on your workflow and overall productivity will be when you can free up hours of time while achieving more than enough accuracy to get the project done.
Another reason why having a high-speed solution matters, as briefly mentioned above, is because some objects tend to not stay still for more than a second or two, for example, people. And when this happens, aside from the aforementioned misalignment possibilities, the captured shapes of what you’re scanning can change as well, with frustrating results.
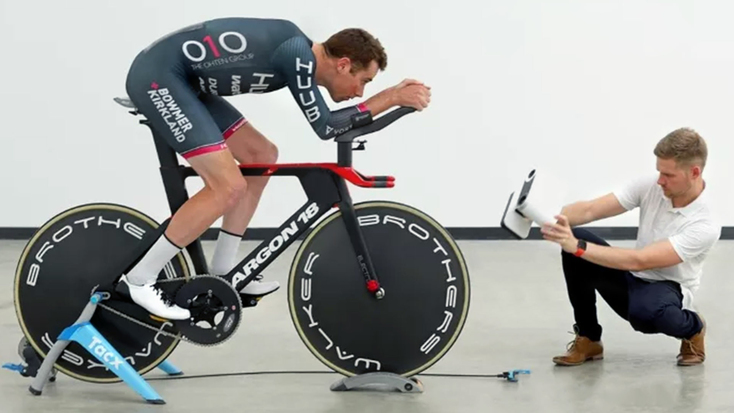
For example, when scanning an athlete for creating an ultra-performance cycling skinsuit, if a slower measurement method were used, whenever the athlete presses their arms against their torso, even gently, their limb shape will change, making the scans inaccurate at best.
Outstanding accuracy: unlike with time-honored methods of measurement such as calipers and rulers, or even CMM machines, with structured light supercharging your 3D scanning workflow, you have the wherewithal to capture the entire object or scene, not merely discrete points and linear stretches of a surface. This is especially true when the object you need to measure is anything more complex than a shoebox, for example.
In the real world, the products and parts and other types of objects we’re working with normally consist of numerous surfaces and millions of possible data points between those few select points usually chosen for measurement. What this means for 3D scanning with structured light is that you’ll be capturing everything with submillimeter accuracy, giving you an all-encompassing, highly-precise digital record of your object or scene.
Perfectly safe for people: structured light has enjoyed widespread usage across multiple spheres of the healthcare industry for years. It’s been extensively tested and medically approved for use on and around everyone from the youngest children to the frailest senior citizens, whether in hospitals, schools, businesses, or elsewhere.
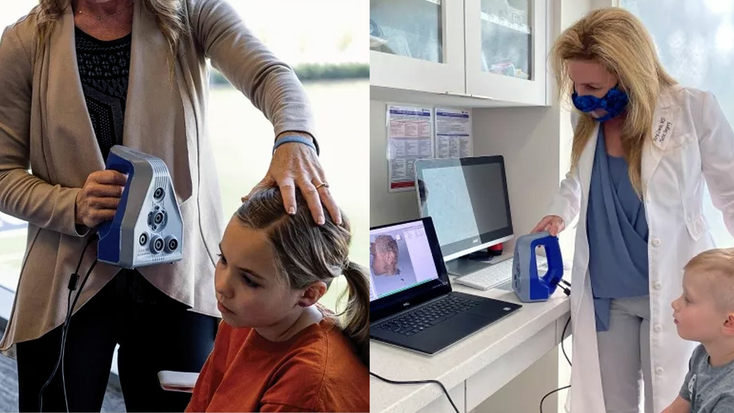
Unlike many laser scanners, with their potential risks of vision damage from prolonged exposure to laser light, and CT scanners, which employ radiation to capture the surfaces and internal geometries of objects, structured light has a proven track record that makes it a hands-down choice as a nonhazardous, effective scanning technology.
Structured-light 3D scanning & two types of photogrammetry
While photogrammetry for CGI and artistic work doesn’t require a dedicated 3D scanner, and certainly it can be used to create 3D models with impressive textures, it’s also not without its drawbacks, the most obvious one being high accuracy.
As we’ll explore in the next section, another kind of photogrammetry solution exists, for use in projects where the demands for accuracy call for metrology-grade performance. For the remainder of this section, however, we’ll focus on conventional photogrammetry, popular among CGI teams and 3D modelers, as introduced above.
Because of CGI photogrammetry’s slow and extended capture sessions, this almost entirely rules out its use for capturing people, as previously noted, and any movement during scanning will seriously affect final accuracy and alignment of the model.
Time-sensitive projects are also out of the question. This pertains to most varieties of quality inspection for manufacturing, where dependable, precise results delivered in minutes are a critical component for avoiding any supply chain bottlenecks.
On top of that, this type of photogrammetry can require a powerful computer to process all the images, which can number in the hundreds if not thousands.
Another problematic concern of artistic photogrammetry is delayed feedback. In essence, you won’t know till you’ve processed your images whether or not you’ve achieved full coverage of your object. And by then, it could be too late.
A topical illustration of this comes from the field of archaeology, where artifacts and fossils encountered on expedition or at a remote dig either can’t or shouldn’t be taken away from where they are.
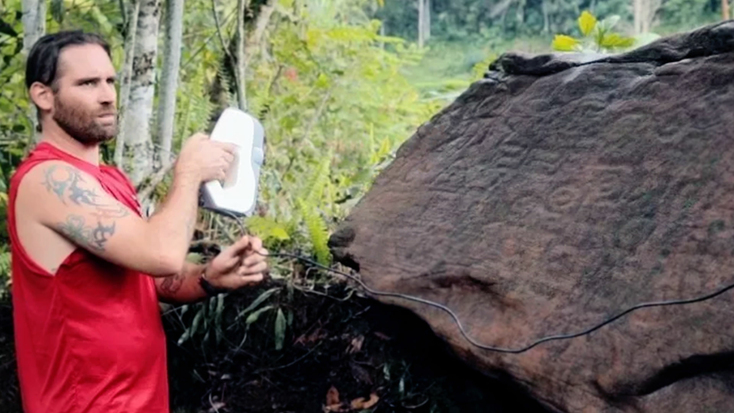
And yet, if your photogrammetry session didn’t capture everything, and you need to go back out there again, you can only hope that looters or vandals or a natural disaster didn’t get there first. For such projects, bringing along a handheld 3D scanner on the expedition, even on horseback across the Andes Mountains, can make all the difference in the world.
A metrological synergy: 3D scanning + metrology photogrammetry
One of the more recent digital capture solutions to make waves across the metrology market and beyond is a special photogrammetry kit that you can use in your 3D scanning workflow: DPA photogrammetry. Unlike CGI photogrammetry, this solution is both incredibly accurate and doesn’t require hour upon hour of processing to stitch together mountains of photographs.
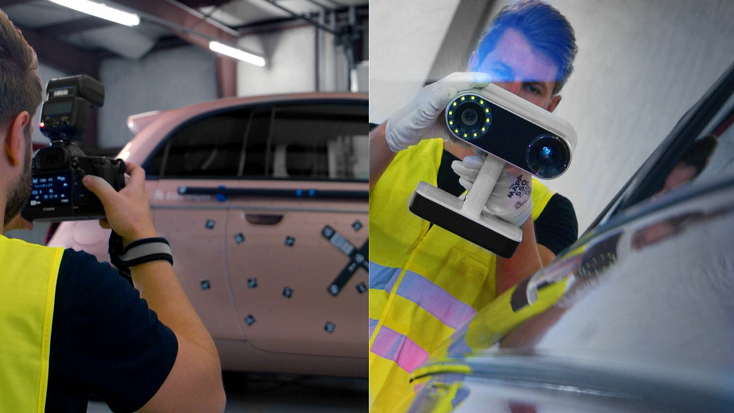
When utilized in synergy with 3D scanning, DPA photogrammetry is used only at the very beginning of the process, to capture the exact physical dimensions of an object or scene, which will then be passed over to the 3D scanning software in the form of an extremely accurate (up to 10 microns) point cloud.
From there, you simply 3D scan whatever you just captured in photographs, and by merging the resulting 3D polygonal mesh from the scanner with the photogrammetric point cloud, the subsequent 3D model will boast exceptional levels of accuracy and resolution, ideal for a broad spectrum of metrology-grade projects.
Popular applications for structured-light 3D scanning
Reverse engineering legacy parts and assemblies
Many companies today encounter situations where they need to repair or even replace older equipment, yet they often find that the original manufacturer either no longer supplies these products, or has gone out of business altogether.
In such cases, by recreating these parts yourself, via a structured-light 3D scanning solution, you can potentially save vast amounts of money, not to mention untold quantities of labor hours. Considering the time and expertise needed to manually measure and painstakingly draw these parts in CAD, a handheld 3D scanner can be worth its weight in platinum.
Such legacy and difficult-to-source parts can be those found in various spheres of healthcare. For example, prosthetics components that may either be out of production entirely or with exorbitant product costs/delivery lead times. Now they can be scanned in-house, CAD customized to match the patient’s anatomy, and then 3D printed on demand.
Documentation of archaeological, cultural, and historical artifacts
For museums and researchers around the world, structured-light 3D scanners make it possible to capture all the surface details of even the most priceless objects, without putting these artifacts and fossils at risk.
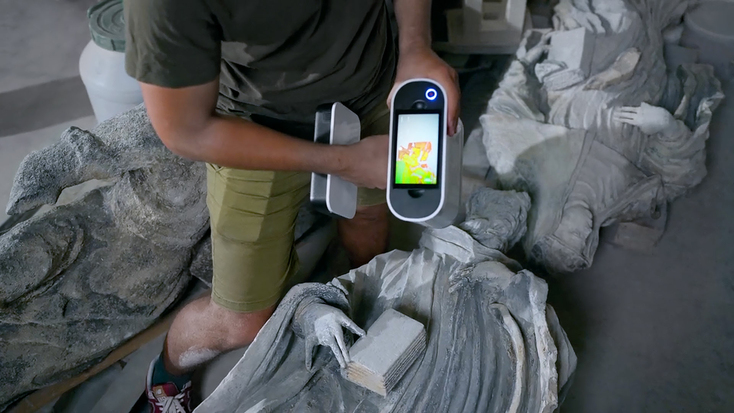
Maybe you need to create unerringly accurate, digital archival copies of prehistoric stone tools, a medieval castle wall, or the skull of an ancient human ancestor. Regardless, it’s vital that these objects are minimally handled, to avoid any damage. Museum curators around the world unanimously agree that structured-light 3D scanning fits this need better than anything else on the market today.
Creating ultra-realistic, full-color CGI and special effects
The use of structured-light 3D scanning for generating lifelike computer graphics for movies, television, and games has now become an industry standard. And by using a portable handheld 3D scanner such as the Artec Leo, it’s easy to visit a set or studio, then scan, process, and deploy digital doubles of actors, props, and even entire scenes, just minutes after being scanned.
Body measurements for perfectly-fitting clothing
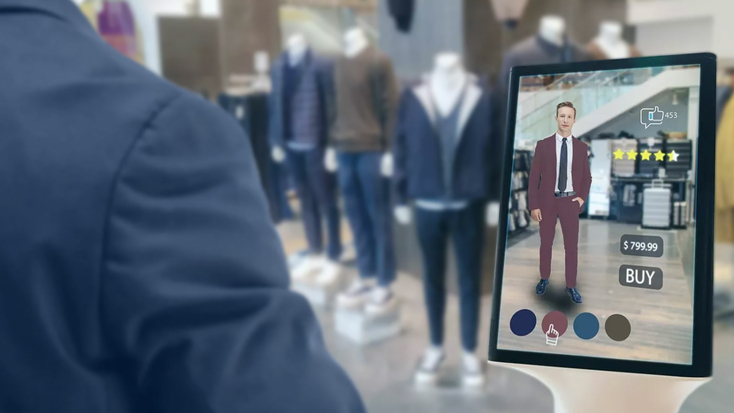
When it comes to accurately measuring the human body, tape measures and calipers can only take you so far. This is where structured-light 3D scanning runs circles around its analog predecessor. Especially with a fast handheld 3D scanner that has no wires or cables to get in your way, you can easily move around a person while digitally capturing them from all angles in just minutes. By doing so, you’ll have precise measurements that even the most meticulous tailor would envy.
Optical measurement and inspection in manufacturing lines
One of the essential concerns many manufacturers have when inspecting products either before, during, or after production is, surprisingly enough, not about accuracy alone. Instead, it’s being able to accurately detect and quantify any variances in a product’s physical structure, while at the same time not causing any damage to the product along the way.
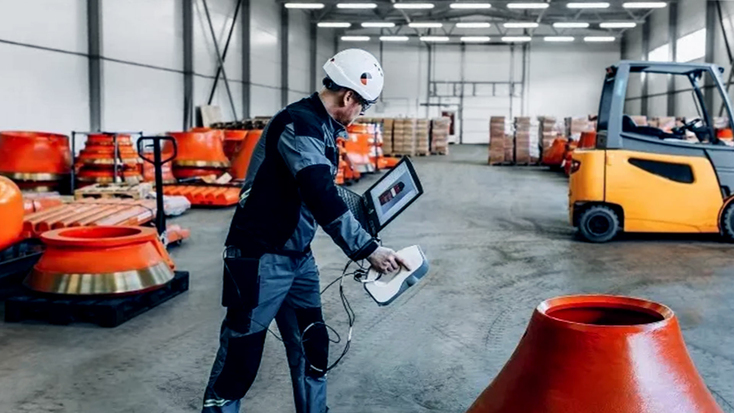
Structured-light 3D scanning gives you that very capacity. Unlike physical measurement solutions such as calipers, micrometers, and even CMM machines, with a 3D scanner, there’s no chance you’ll nick, scratch, or deform any surface in any way.
And in your 3D scanning software, no matter where you’re inspecting, on the line or even at the loading dock, you can have visual confirmation of any manufacturing variances that exist, with definitive accuracy down into the submillimeter.
Potential weaknesses of structured-light scanners
Before making decisions about new technologies, it’s important to understand their relative strengths together with any possible shortcomings. In this respect, structured light has far more of the former than otherwise. Nevertheless, here are some conditions which may test the limits of certain structured-light 3D scanners.
Excessive movement of the object during scanning
When any handheld structured-light 3D scanner is capturing an object, it’s expected that whatever you’re scanning will either be still, or moving in a controlled fashion, such as when being rotated on a turntable.
While all 3D scanners to a lesser or greater degree face these disadvantages, the results depend very much on the FPS capture rate of your scanner. For example if the movement of either the object or the scanner is excessive, the scanner may lose tracking. After this, you’ll need to start scanning the same area again, and wait for the scanner to regain tracking. But for a structured-light scanner with a very high FPS, this is unlikely to be an issue.
This is more of a workflow issue, in that it can unnecessarily extend the length of your scanning session, with the rescanning you’ll need to do. The answer for this can be as facile as, from the beginning, slowing down and scanning your object in regular, steady sweeps. If you’re scanning a person or other living creature, try to keep them as still as possible.
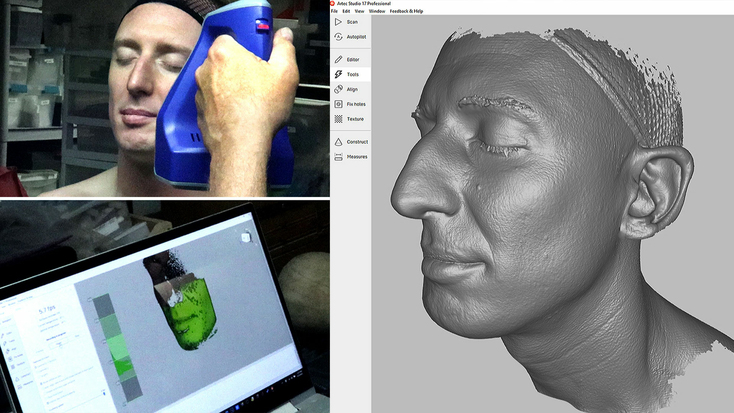
If there is still a tiny bit of movement, having a fast enough scanner, especially one that allows you to quickly and easily maneuver around the person or critter you’re scanning, can make all the difference here. Check the capabilities of your scanner before any critical project takes place, particularly if the object you need to capture will be there for only a brief window of time.
Difficult-to-capture surfaces for 3D scanners & photogrammetry
There are several kinds of surfaces that often prove challenging for any 3D scanner, as well as CGI photogrammetry to capture. Now, that doesn’t mean these are impossible to scan. With the right preparation, as well as a high-quality 3D scanner, you can significantly increase your chances of digital success.
Very dark surfaces: although these kinds of surfaces are not extremely common, they do exist, and can easily absorb enough of the structured light so the pattern isn’t properly reflected back up to the scanner’s camera.
Pro tip for scanning super-dark surfaces: if you have a scanner with user-adjustable sensitivity settings in the software, during the scan preview, try increasing the scanner’s sensitivity until the surface becomes visible to the scanner.
Highly-reflective surfaces, e.g. chrome or other shiny metal: when structured light strikes such surfaces, it can simply bounce off in unpredictable directions, making it technically impossible for the scanner’s camera to adequately capture accurate images of the distorted light patterns.
Pro tip for scanning highly-reflective surfaces: experiment with scanning at various angles and distances from the object. Sometimes it just takes repositioning the scanner and adjusting the angle so you’re not scanning directly perpendicular to the object.
This way, the structured light can disperse more gradually rather than reflecting straight back into the camera. Try this and you may find that a previously impossible-to-capture surface suddenly becomes scannable.
Glassy, clear, or even semi-translucent surfaces: this could be anything from a thin layer of water to a sheet of ice, or a car’s windows, possibly even precious stones or composite materials. When a scanner’s structured light passes right through the material, or gets diffused while going through, it’s not able to bounce back to the camera and register the true surface geometry.
Pro tip for scanning glassy or translucent surfaces: a wide array of options exists for making these surfaces properly reflect structured light rather than absorbing and/or diffusing it. A DIY approach could involve cornstarch or baby powder sprinkled upon the object to be scanned.
As well, there are some high-quality matte sprays available that vanish after anywhere from minutes to hours, giving you ample time for scanning your entire object from top to bottom.
Hairy and furry surfaces: when structured light strikes these kinds of materials, the light can bounce off in multiple directions, and the scanner’s camera isn’t usually able to capture enough of the light pattern to distinguish the object’s actual surface geometries.
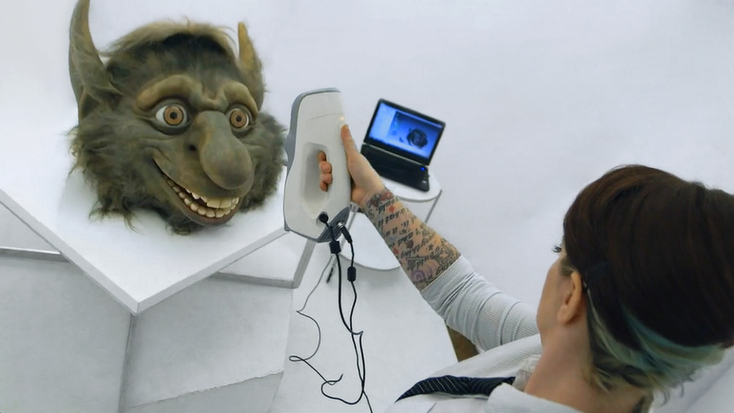
Pro tip for scanning hair, feathers, or similar materials: if your scanner has a sensitivity setting in the software, you’ll want to turn it up very high, so that the scanner will detect the hair’s subtle geometries. And if you’re doing a head scan, be sure to scan “from ear to ear,” moving the scanner upwards towards the crown of the head and over the top to the other side.
It will also help if you keep the neck and shoulders in the scanner’s field of view as much as possible, so the scanning software will track these features as references, which will allow the scanner to much more easily track the hair and capture it.
Very thin objects (or sections of objects): it all comes down to not having enough surface area that can be illuminated by the structured light and also able to reflect it back in sufficient volumes to the scanner’s camera. For example, as the scanner is attempting to capture the thin edge of an object, there may be just a few millimeters in width (or even less) of surface area presenting itself.
Pro tip for scanning very thin objects: many times this hurdle can be overcome by just including a colorful or patterned background in the scanner’s field of view. This can be as simple as keeping a sheet of paper with text and/or geometrical shapes and patterns right behind the thin object/surface you’re scanning.
Recessed surfaces and deep undercuts: no matter how capable the scanner – and it’s easier to reach these areas with a handheld scanner – if the structured light can’t reach some section or part of the object or scene you’re capturing and then bounce back to the scanner’s camera, the scanner simply won't “see” it, which means it won’t be captured.
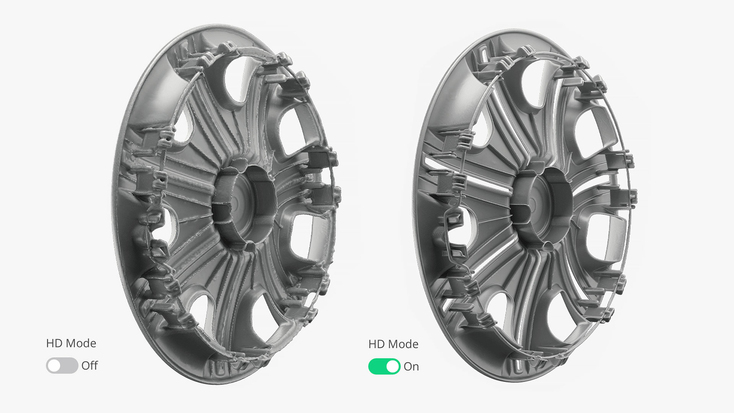
Pro tip for scanning recessed surfaces: some scanners are better at this than others. As well, one of the most effective solutions for these kinds of hard-to-reach surfaces is AI-driven scanning software that visually recognizes a vast array of partial features in scans and digitally reconstructs these surfaces in high-resolution color 3D with astonishing levels of accuracy.
Conclusion
As evident from the above overview, today, more than ever before, structured light 3D scanning technology provides us with a fast, easy-to-use, accurate, and effective approach for capturing objects and scenes of various sizes and complexities. Thousands of dedicated users around the world would undoubtedly agree with this.
Furthermore, with schools and universities from East to West embracing 3D scanning solutions in ever-increasing numbers, the future looks bright, indeed, not only for education, but also throughout industries of all kinds, including manufacturing, forensics and CSI, healthcare, research, and beyond.
Read this next
More from
the Learning center
When using a structured-light 3D scanner, there are certain rules and factors every professional should know. In this article, we’ll show you how to prepare an object and environment before you start scanning, different techniques, and some tricks to get the best possible 3D scan of your object.
After reviewing the top 3D scanner lists available on the Internet, we noticed that most don’t include information about the key parameters of the objects you need to scan. Important categories such as object size and the application(s) you’ll be using the scanner for are not covered. This review aims to fill this gap and help you find the best 3D solution for your project.
Looking for a new professional 3D scanner? We know how hard it can be to find the right solution. That’s why we’ve created a checklist of everything you need to weigh up, from specs to practical considerations, to help you identify a product that meets your exact needs.


